How to Grow Pumpkins: A Complete Beginner's Guide to Bigger Harvests
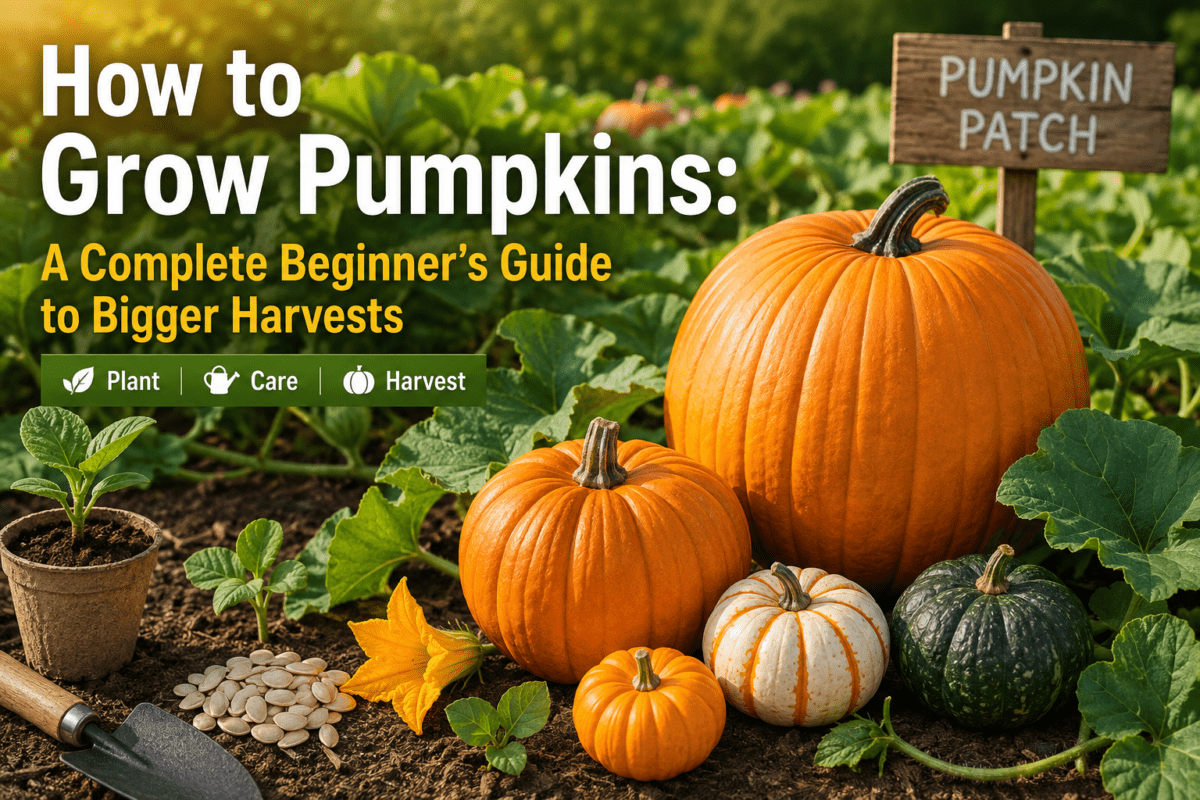
Pumpkins are one of the most rewarding vegetables to grow at home. Whether you want fresh pumpkins for cooking, decorating your home during fall, carving for Halloween, or even growing giant pumpkins for fun competitions, pumpkin plants can produce an impressive harvest with the right care.
Many beginners believe pumpkins are difficult to grow because the vines spread so much and the fruits become very large. In reality, pumpkins are surprisingly easy to grow once you understand their basic needs. Give them plenty of sunlight, fertile soil, regular watering, and enough space, and they will reward you with healthy vines and beautiful fruits.
I grew up in a farming family where pumpkins were planted almost every year alongside many other vegetables. Later, I started growing pumpkins in my own home garden and experimented with different varieties, fertilizers, and growing methods. Over the years, I discovered that small improvements in soil preparation, watering, and feeding can dramatically increase both the number and size of pumpkins.
Whether you’re planning to grow pumpkins in a backyard garden, raised bed, grow bag, or even a large container, this guide will walk you through every step. You’ll learn how to grow pumpkins from seeds, choose the right variety, prepare healthy soil, fertilize properly, prevent common problems, and harvest pumpkins at the perfect time.
If you’re ready to enjoy a bigger and healthier pumpkin harvest, let’s begin.
In This Guide, You'll Learn
In this complete guide, you’ll learn:
- How to grow pumpkins successfully from seeds or healthy seedlings
- How to choose the best pumpkin variety for your garden
- When to plant pumpkins for the best harvest in different climates
- How to prepare the best soil for pumpkins
- Proper planting methods and spacing requirements
- The best fertilizer for pumpkins and when to apply it
- How to use organic fertilizers for healthier plants
- How to grow pumpkins in containers, pots, and small spaces
- Tips for growing giant pumpkins naturally
- Whether the “milk trick” for giant pumpkins actually works
- How to water, mulch, and care for pumpkin plants throughout the season
- How to identify and prevent common pumpkin pests and diseases
- How long pumpkins take to grow from planting to harvest
- The correct way to harvest pumpkins for maximum storage life
- How to save pumpkin seeds for growing next season
Table of Contents
ToggleChoosing the Right Pumpkin Variety
One of the biggest mistakes beginners make is planting the wrong pumpkin variety. Not every pumpkin is grown for the same purpose. Some varieties are ideal for cooking, while others are better for carving, decorating, or producing giant fruits.
Before buying seeds, think about what you want from your harvest. Choosing the right variety will make growing pumpkins much easier and improve your final results.
Best Pumpkin Varieties for Beginners
If you’re growing pumpkins for the first time, these varieties are excellent choices:
Jack-o’-Lantern
Jack-o’-Lantern pumpkins are probably the most recognizable pumpkins in the world. They have bright orange skin, medium-sized fruits, and sturdy handles, making them perfect for Halloween carving. They are widely considered one of the most beginner-friendly pumpkin varieties thanks to their reliable growth and relatively simple care requirements.
Howden
Howden pumpkins are another favorite among home gardeners. They produce uniform, round fruits with thick walls and strong vines. Their excellent storage life makes them ideal for fall decorations and carving.
Sugar Pie
If your goal is cooking rather than decorating, Sugar Pie pumpkins are one of the best options. Their flesh is sweet, smooth, and perfect for homemade pumpkin pie, soups, and baking.
New England Pie
This heirloom variety is prized for its rich flavor and fine texture. Many experienced gardeners consider it one of the best pumpkins for cooking.
Cinderella
Cinderella pumpkins, also known as Rouge Vif d’Étampes, are easily recognized by their flattened shape and rich orange-red skin. Besides looking beautiful in the garden, they’re excellent for roasting and baking.
Miniature Pumpkins
Mini pumpkins grow quickly and require less space than larger varieties. They’re great for container gardens, children’s gardening projects, and seasonal decorations.
Giant Pumpkins
If you’ve ever wondered how to grow giant pumpkins, you’ll need special varieties such as Dill’s Atlantic Giant. These pumpkins can grow to extraordinary sizes when given proper care, nutrition, and plenty of space.
How to Choose the Right Variety
Instead of choosing a pumpkin simply because it looks attractive, consider these factors:
- Your local climate
- Available growing space
- Whether you want pumpkins for cooking, carving, or decoration
- Days to maturity
- Disease resistance
- Vine size
For small gardens, compact or bush varieties are often the better choice. If you have a large backyard, traditional vining pumpkins usually produce higher yields.
Best Time to Plant Pumpkins
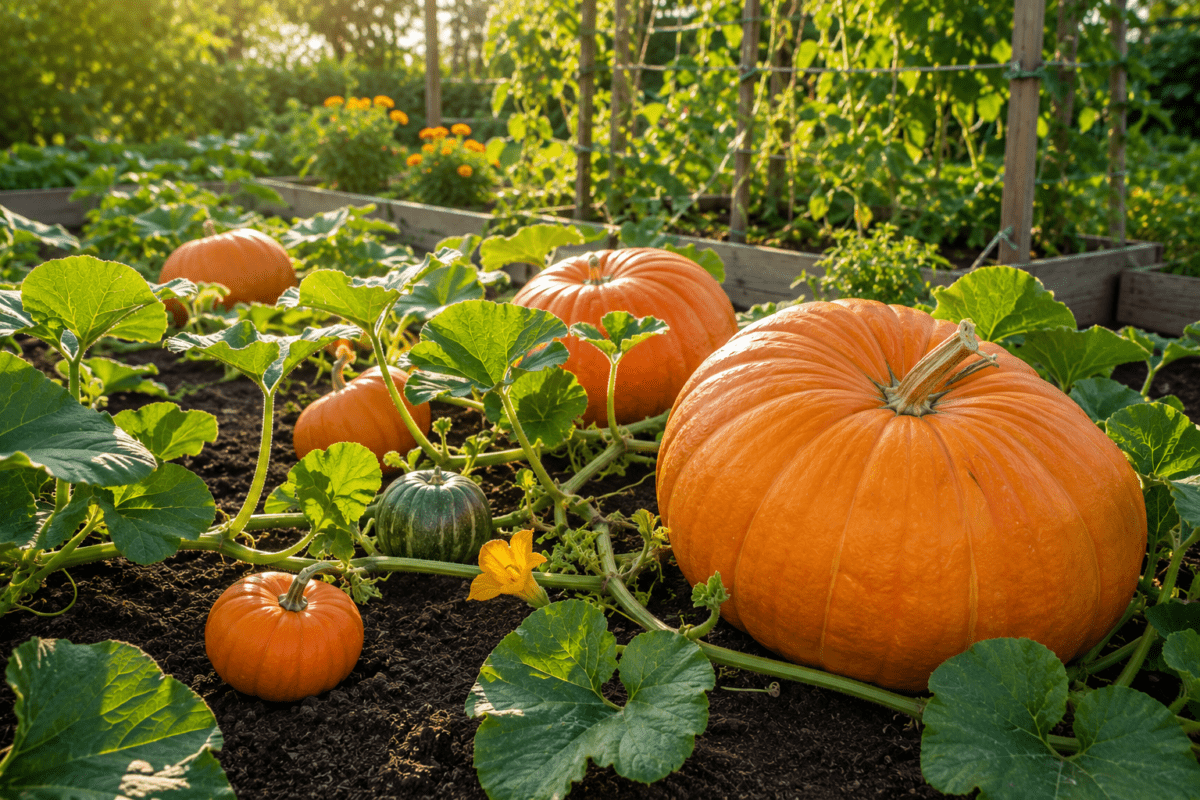
Planting pumpkins at the right time is just as important as choosing the right variety. Plant too early, and frost may damage young seedlings. Plant too late, and the fruits may not mature before cold weather arrives.
Pumpkins thrive in warm conditions. Both the soil and the air should be consistently warm before planting outdoors.
General Planting Time
In most regions, pumpkin seeds should be planted after the danger of frost has completely passed.
A good rule is to wait until soil temperatures reach at least 65°F (18°C).
Southern United States
Gardeners living in warmer southern states usually plant pumpkins between late March and early April.
The longer growing season gives vines plenty of time to produce large, healthy fruits.
Northern United States
In cooler northern regions, planting typically begins between late May and early June, after the soil has warmed.
Starting too early may expose seedlings to damaging cold temperatures.
Growing from Seed Indoors
Gardeners in regions with shorter growing seasons often get a head start by sowing pumpkin seeds indoors a few weeks before the final spring frost. Once nighttime temperatures remain warm and the risk of frost has passed, the seedlings can be transplanted outdoors.
Signs That It's Time to Plant
Before planting, make sure:
- The last spring frost has passed.
- Soil temperature is above 65°F (18°C).
- The planting area receives at least 6–8 hours of sunlight daily.
- Heavy rain or freezing temperatures are no longer expected.
Waiting just a little longer for warmer weather often results in stronger seedlings and a much healthier harvest.
Growing Pumpkins from Seeds
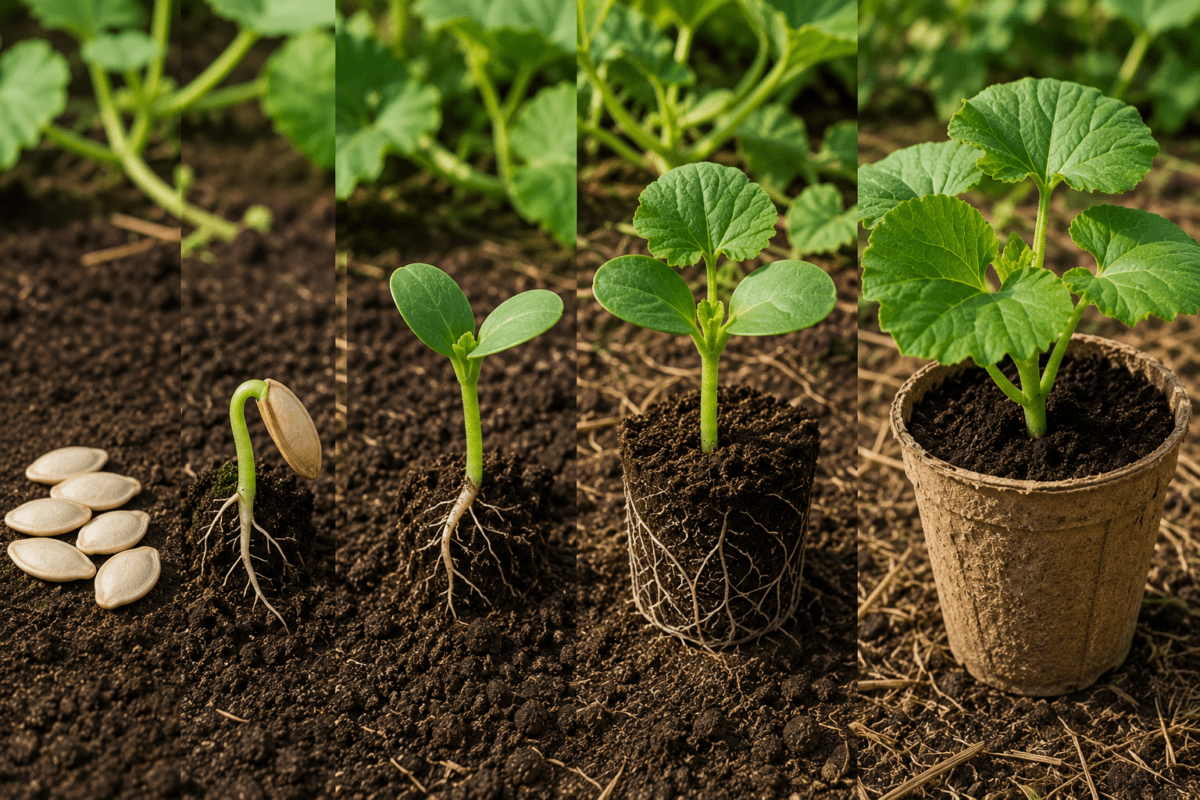
Many gardeners wonder whether it’s better to start with seeds or buy young plants from a nursery. Both methods work well, but growing pumpkins from seeds gives you access to more varieties and can be very rewarding. It’s also an excellent way to save money if you’re planting several pumpkin vines.
If you’re wondering how to grow pumpkins from seeds, the process is much easier than many beginners expect. Pumpkin seeds germinate quickly in warm conditions, and healthy seedlings are usually ready for transplanting within a few weeks.
Choosing Quality Seeds
Healthy plants begin with healthy seeds. Always purchase seeds from a reputable supplier or use seeds saved from mature, disease-free pumpkins.
If you’re saving seeds from your own harvest, allow the pumpkin to fully mature before collecting them. Mature seeds have a better germination rate and produce stronger seedlings.
How to Grow a Pumpkin from a Seed
Pumpkin seeds can be started indoors or planted directly outdoors after the last frost.
To start seeds indoors:
- Fill small pots or seed trays with a quality seed-starting mix.
- Sow one or two seeds about 1 inch (2.5 cm) deep.
- Water gently until the growing medium is evenly moist.
- Place the pots in a warm location with temperatures between 70–85°F (21–29°C).
- Provide plenty of bright light once seedlings emerge.
Under ideal conditions, seeds usually germinate within 5–10 days.
If two seedlings grow in the same pot, keep the strongest one and carefully remove the weaker seedling instead of pulling it out, which could disturb the roots.
Direct Sowing Outdoors
If your climate has a long growing season, you can sow pumpkin seeds directly into the garden after the soil has warmed.
Plant two or three seeds per planting hole, then thin them to the strongest seedling after they develop several true leaves.
Direct sowing often produces vigorous plants because the roots are never disturbed by transplanting.
Preparing Healthy Pumpkin Seedlings
Whether you grow your own seedlings or purchase them from a garden center, healthy young plants establish faster and usually produce larger harvests.
Before transplanting, seedlings should have:
- At least 3–4 true leaves
- Thick, sturdy stems
- Healthy green foliage
- No signs of pests or disease
- Well-developed roots without becoming root-bound
If you started seeds indoors, harden off the seedlings for about 7–10 days before planting outside. Gradually expose them to outdoor conditions by increasing their time outside each day. This simple step helps reduce transplant shock and encourages stronger growth.
Best Soil for Pumpkins
Healthy soil is one of the biggest factors that determines the success of your pumpkin harvest. Even the best variety won’t reach its full potential if it’s planted in poor soil.
Pumpkins are heavy feeders, meaning they need nutrient-rich soil with good drainage and plenty of organic matter.
Ideal Soil pH
The best soil for pumpkins has a pH between 6.0 and 6.8.
If you’re unsure about your soil, consider using an inexpensive soil test kit before planting. Testing allows you to adjust the pH and nutrient levels before the growing season begins.
Improve Soil Before Planting
Before transplanting seedlings or sowing seeds, prepare the planting area thoroughly.
Mix generous amounts of organic matter into the soil, such as:
- Finished compost
- Well-rotted manure
- Leaf mold
- Aged organic matter
These materials improve soil structure, increase water retention, and provide slow-release nutrients throughout the season.
If your garden contains heavy clay, loosen it by adding compost and coarse organic material. Sandy soil benefits from additional compost because it helps retain moisture without becoming waterlogged.
Sunlight Requirements
Pumpkins thrive in full sun.
Choose a location that receives at least 6–8 hours of direct sunlight every day. More sunlight generally leads to stronger vines, better flowering, and larger pumpkins.
Avoid planting in shaded areas where vines receive limited light, as this often results in fewer flowers and reduced fruit production.
Planting Pumpkins
Once the soil has warmed and your seedlings are ready, it’s time to plant them in their permanent location.
Good spacing is essential because pumpkin vines spread rapidly as they grow.
Prepare the Planting Area
Before planting:
- Remove weeds and grass.
- Clear away rocks and debris.
- Loosen compacted soil.
- Mix compost into the planting area.
- Water the soil lightly if it’s very dry.
Preparing the site properly allows young roots to establish quickly.
Planting Depth
Transplant seedlings at the same depth they were growing in their containers.
Avoid planting them deeper than necessary, as covering too much of the stem can increase the risk of rot.
After planting, water thoroughly to help settle the soil around the roots.
Pumpkin Spacing
Proper spacing improves air circulation, reduces disease problems, and gives vines enough room to spread.
A general guide is:
- Bush varieties: 2–3 feet (60–90 cm) apart
- Small vining varieties: 3–4 feet (90–120 cm) apart
- Large vining varieties: 4–6 feet (1.2–1.8 m) apart
If planting in rows, leave approximately 6–8 feet (1.8–2.4 m) between rows to allow vines to grow freely.
Although it may be tempting to plant pumpkins closer together, overcrowding often reduces airflow and increases the likelihood of fungal diseases.
Water Immediately After Planting
Newly transplanted pumpkins need consistent moisture while their roots become established.
Water deeply immediately after planting, then continue watering whenever the top inch of soil begins to dry.
Deep watering encourages roots to grow downward, helping plants become more drought tolerant later in the season.
Best Fertilizer for Pumpkins
Healthy pumpkin plants need more than sunlight and water to produce large, flavorful fruits. Pumpkins are considered heavy feeders, meaning they use a significant amount of nutrients throughout the growing season. Feeding them at the right time—and with the right type of fertilizer—can make a noticeable difference in vine growth, flowering, and fruit size.
Rather than applying the same fertilizer all season, it’s more effective to adjust your feeding schedule as the plant develops. Young plants benefit from nitrogen to build strong vines and leaves, while flowering and fruiting plants need more phosphorus and potassium to support healthy blooms and larger pumpkins.
What Is the Best Fertilizer for Pumpkins?
The best fertilizer for pumpkins depends on the plant’s stage of growth.
Before planting, incorporate a balanced fertilizer into the soil to give young plants a strong start. A formula such as 10-10-10 or 5-5-5 works well because it provides equal amounts of nitrogen, phosphorus, and potassium.
Once the vines enter their active growth stage, begin using a fertilizer with a slightly higher nitrogen level to support vigorous leaf and vine development. Once flower buds appear, reduce nitrogen and choose a fertilizer that contains more phosphorus and potassium to promote flowering and fruit development.
A simple feeding schedule looks like this:
Growth Stage | Recommended Fertilizer |
Before planting | Balanced fertilizer (10-10-10 or similar) |
Early vine growth | Nitrogen-rich fertilizer |
Flowering | Higher phosphorus and potassium |
Fruit development | Continue phosphorus and potassium-rich feeding |
Avoid applying excessive nitrogen late in the season. Too much nitrogen often results in vigorous vines with very few pumpkins.
Best Organic Fertilizer for Pumpkins
Organic fertilizers are a popular choice among home gardeners because they enrich the soil naturally while supplying nutrients steadily over an extended growing period.
Over the years, I’ve found that combining compost with a few natural organic fertilizers produces healthier vines and more consistent harvests than relying on synthetic fertilizers alone.
Some of the best organic fertilizers for pumpkins include:
- Finished compost
- Well-rotted manure
- Fish emulsion
- Bone meal
- Blood meal
- Kelp meal
- Wood ash (used carefully)
- Worm castings
Each organic fertilizer provides different nutrients, so combining several options often gives the best results.
Before Planting
Mix 2–3 inches of finished compost into the planting area before sowing seeds or transplanting seedlings.
This improves soil structure, increases moisture retention, and slowly releases nutrients as plants grow.
Early Growth
When vines begin producing new leaves, apply fish emulsion or another gentle nitrogen-rich organic fertilizer every two to three weeks.
Healthy foliage helps the plant capture more sunlight, supporting future flower and fruit production.
Flowering and Fruiting
Once flower buds begin opening, reduce nitrogen and focus on phosphorus and potassium.
Bone meal is an excellent source of phosphorus, while wood ash can supply potassium when used in moderation.
Regular applications of compost around the base of each plant also help replenish nutrients throughout the growing season.
Watering Pumpkins Properly
Water management is one of the most overlooked aspects of growing pumpkins successfully.
Pumpkin vines grow rapidly, produce large leaves, and develop heavy fruits, all of which require a steady supply of moisture.
Rather than watering on a fixed schedule, check the soil regularly. Water whenever the top inch (2–3 cm) begins to feel dry.
Deep watering is far better than frequent shallow watering because it encourages roots to grow deeper into the soil.
Best Watering Practices
For healthier plants:
- Water early in the morning whenever possible.
- Direct water toward the soil instead of the leaves.
- Water deeply rather than lightly.
- Keep the soil evenly moist but never waterlogged.
- Increase watering during flowering and fruit development.
Avoid overhead watering late in the day, as wet foliage overnight can encourage fungal diseases such as powdery mildew.
Mulching Around Pumpkin Plants
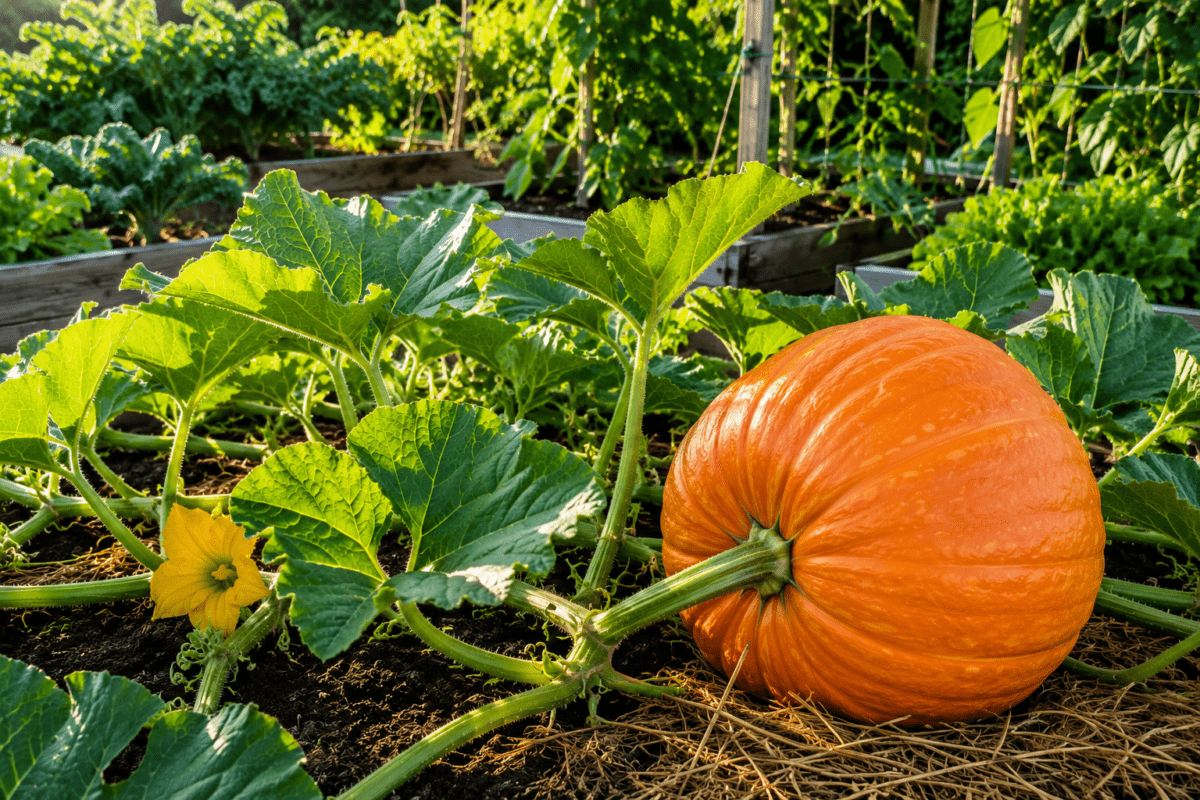
Mulching is a simple gardening practice that offers several important benefits throughout the growing season.
A layer of organic mulch helps retain soil moisture, suppress weeds, regulate soil temperature, and keep developing pumpkins cleaner as they mature.
Some excellent mulch materials include:
- Straw
- Shredded leaves
- Pine needles
- Untreated grass clippings
- Compost
Spread 2–3 inches of mulch around each plant, leaving a small gap around the main stem to prevent excess moisture from collecting against it.
Besides conserving moisture, mulch also reduces competition from weeds, allowing pumpkin plants to use more energy for producing healthy vines and fruit.
Supporting Pumpkin Vines
Most traditional pumpkin varieties produce long, vigorous vines that naturally spread across the ground. If space isn’t a limitation in your garden, simply letting the vines spread naturally across the ground is usually the most practical and low-maintenance approach.
However, gardeners with limited growing areas can successfully train pumpkins to grow vertically using a sturdy trellis or fence.
Training pumpkin vines upward on a sturdy support allows better airflow, prevents developing fruit from sitting on wet soil, and makes harvesting much more convenient.
If you’re growing larger pumpkin varieties on a trellis, support developing fruits with fabric slings, mesh bags, or old T-shirts tied securely to the support structure. This prevents heavy pumpkins from pulling away from the vine as they grow.
For gardeners wondering how to grow pumpkins in a small space, vertical growing is one of the most effective techniques for maximizing production without sacrificing valuable garden space.
General Pumpkin Care Throughout the Season
Healthy pumpkin plants require regular attention, but they don’t demand constant maintenance.
Checking your plants once or twice each week allows you to catch small problems before they become serious.
Throughout the growing season:
- Remove weeds regularly.
- Monitor soil moisture.
- Feed plants according to their growth stage.
- Watch for insect damage.
- Remove yellow or diseased leaves when necessary.
- Guide vines away from walkways or neighboring plants.
- Inspect flowers and developing pumpkins for signs of pests or disease.
Consistent care often makes a bigger difference than any single fertilizer or gardening technique.
By paying attention to your plants throughout the season, you’ll enjoy stronger vines, healthier foliage, and a much more productive pumpkin harvest.
Growing Pumpkins in Containers
If you have limited garden space, don’t worry—you can still enjoy a productive pumpkin harvest. While pumpkins are known for their sprawling vines, many compact and bush varieties grow surprisingly well in large containers. With the right container, fertile potting mix, and regular care, container-grown pumpkins can produce healthy vines and delicious fruits.
Many gardeners ask how to grow pumpkins in a container or how to grow a pumpkin in a pot. The process is straightforward, but success depends on choosing the proper container size and providing consistent moisture and nutrients.
Choosing the Right Container
Pumpkins develop extensive root systems, so they need plenty of room to grow.
For most compact varieties, choose a container that holds at least 15–20 gallons (60–75 liters) of soil. Larger varieties perform even better in containers holding 25 gallons or more.
The container should also have several drainage holes to prevent excess water from collecting around the roots.
Suitable containers include:
- Large plastic pots
- Wooden planters
- Half whiskey barrels
- Fabric grow bags
- Raised planter boxes
Fabric grow bags are particularly popular because they provide excellent drainage, improve root aeration, and naturally reduce the risk of root circling.
Best Potting Mix for Container Pumpkins
Avoid filling containers with ordinary garden soil, as it can become compacted and drain poorly.
Instead, use a lightweight potting mix containing:
- High-quality potting soil
- Finished compost
- Coco coir or peat moss
- Perlite for improved drainage
Together, these ingredients hold enough moisture for healthy root growth while still allowing surplus water to drain away efficiently.
Before planting, mix in a slow-release balanced fertilizer to supply nutrients during the first few weeks of growth.
Caring for Container-Grown Pumpkins
Container-grown pumpkins dry out faster than pumpkins planted directly in the ground.
During warm weather, check soil moisture daily.
Check the potting mix regularly and give the plant a thorough watering whenever the top inch feels dry to the touch.
Feed container-grown plants every 2–3 weeks using either a balanced liquid fertilizer or an organic fertilizer throughout the growing season.
As vines begin producing flowers and fruit, switch to a fertilizer higher in phosphorus and potassium.
Growing Pumpkins in Small Spaces
Many people believe pumpkins require enormous gardens, but that’s no longer true.
If you’re wondering how to grow pumpkins in a small space, several simple techniques can help you grow healthy pumpkins even in compact gardens, patios, balconies, or urban backyards.
The key is choosing compact varieties and making the best use of vertical growing space.
Space-Saving Tips
For small gardens:
- Grow compact or bush pumpkin varieties.
- Use large containers or grow bags.
- Train vines onto a sturdy trellis.
- Prune unnecessary side shoots when appropriate.
- Keep vines organized to improve airflow.
Vertical growing allows vines to climb instead of spreading across the ground, making small gardens much more productive.
If fruits become heavy, support them using mesh slings or soft fabric tied securely to the trellis.
This technique reduces pressure on the vines while keeping pumpkins clean and improving air circulation around the plants.
How to Grow a Pumpkin Patch
Creating a pumpkin patch is easier than many beginners expect.
If you have a larger backyard or garden, dedicating one area entirely to pumpkins allows vines to spread naturally while producing higher yields.
Choose an open location that receives full sunlight throughout the day.
Prepare the soil by incorporating generous amounts of compost before planting.
Allow plenty of space between each plant because healthy pumpkin vines can spread several feet in every direction.
Adding straw mulch between rows helps suppress weeds, conserve moisture, and keep developing pumpkins clean.
With proper spacing and regular maintenance, even a small pumpkin patch can produce an impressive harvest for your family.
How to Grow Giant Pumpkins
Growing giant pumpkins requires more planning than growing ordinary pumpkins, but the rewards can be incredible.
Gardeners around the world compete every year to produce pumpkins weighing hundreds—or even thousands—of pounds.
Fortunately, many of the same gardening principles still apply.
The biggest differences are choosing the right variety, providing more space, and carefully managing nutrition throughout the season.
Choose the Right Variety
If your goal is growing enormous pumpkins, ordinary carving varieties won’t produce record-breaking fruits.
Most experienced growers choose Dill’s Atlantic Giant, the world’s most famous giant pumpkin variety.
Its genetics allow it to produce exceptionally large fruits under ideal growing conditions.
Give Giant Pumpkins Plenty of Space
Unlike compact varieties, giant pumpkins require enormous growing space.
Each plant should have approximately 800–1,000 square feet available for the vines to spread naturally.
Crowded vines compete for sunlight, nutrients, and moisture, limiting fruit size.
Feed Plants Throughout the Season
Large pumpkins consume tremendous amounts of nutrients.
Before planting, enrich the soil with compost and well-rotted manure.
Continue feeding throughout the season by adjusting fertilizer as the plant develops:
- Balanced fertilizer during establishment
- Higher nitrogen during vine growth
- Increased phosphorus during flowering
- Potassium-rich fertilizer during fruit enlargement
Consistent watering is equally important because uneven soil moisture can slow fruit development or even cause pumpkins to crack.
Focus on One or Two Fruits
One technique used by experienced giant pumpkin growers is removing extra fruits early in the season.
Rather than allowing several pumpkins to develop, the plant concentrates its energy on one or two selected fruits.
This allows the remaining pumpkins to reach much larger sizes.
Healthy leaves are equally important because they produce the energy needed for rapid fruit growth.
Avoid removing excessive foliage unless it’s damaged or diseased.
How to Grow Giant Pumpkins with Milk: Does It Really Work?
You may have heard the old gardening story about growing giant pumpkins with milk.
According to this old gardening belief, placing a freshly cut vine into a container of milk is thought to provide extra nutrients that help the pumpkin grow larger.
Although this method has been shared for decades, there’s no reliable scientific evidence showing that milk alone produces giant pumpkins.
Professional growers achieve record-breaking pumpkins through:
- Excellent genetics
- Healthy soil
- Balanced fertilization
- Consistent watering
- Proper pruning
- Careful fruit selection
- Season-long plant care
Milk can be useful in certain gardening situations, but it should never replace proper nutrition and good cultural practices.
If you’re serious about producing giant pumpkins, you’ll achieve far better results by focusing on healthy soil, balanced nutrition, and consistent plant care instead of depending on popular gardening myths.
Common Pumpkin Pests and Diseases
Even healthy pumpkin plants can occasionally face problems with insects and diseases. The good news is that regular inspection and early action can prevent most issues from becoming serious.
Walk through your pumpkin patch at least once a week and look closely at the leaves, stems, flowers, and developing fruit. Catching problems early is much easier than trying to save a heavily damaged plant later.
Common Pumpkin Pests
Some of the most common pumpkin pests include:
- Squash bugs
- Squash vine borers
- Aphids
- Cucumber beetles
- Spider mites
Most pests feed on leaves or stems, weakening the plant and reducing fruit production.
If you notice insects early, remove them by hand or spray the affected areas with insecticidal soap or neem oil according to the product label. Encouraging beneficial insects such as ladybugs and lacewings can also help keep pest populations under control naturally.
Common Pumpkin Diseases
Pumpkins may also develop diseases, especially during warm and humid weather.
Some of the most common diseases include:
- Powdery mildew
- Downy mildew
- Bacterial wilt
- Anthracnose
- Root rot
Many fungal diseases spread quickly when leaves remain wet for long periods.
To reduce disease problems:
- Water at the base of the plant.
- Avoid overhead watering late in the day.
- Provide adequate spacing for better airflow.
- Remove infected leaves promptly.
- Rotate crops each year instead of planting pumpkins in the same location repeatedly.
Healthy soil, proper spacing, and good watering habits are often the best disease prevention methods.
How Long Does It Take for Pumpkins to Grow?
One of the questions beginners ask most often is how long does it take for pumpkins to grow.
The answer depends on the variety you’re growing, your local climate, and how well the plants are cared for.
Most pumpkin varieties reach maturity within 90 to 125 days after planting.
In general:
- Mini pumpkins: 90–100 days
- Pie pumpkins: 90–110 days
- Jack-o’-Lantern pumpkins: 100–110 days
- Giant pumpkins: 110–125 days or longer
Pumpkins grow more vigorously when they receive warm weather, nutrient-rich soil, consistent moisture, and timely fertilization throughout the season.
If you’re wondering how long do pumpkins take to grow, remember that fruit size is just as important as time. Allow pumpkins to mature naturally on the vine for the best flavor, color, and storage life.
Harvesting Pumpkins
Harvest time is one of the most rewarding moments of the entire growing season.
Although it may be tempting to pick pumpkins as soon as they turn orange, waiting until they’re fully mature improves both flavor and storage life.
Signs Your Pumpkins Are Ready
Pumpkins are usually ready to harvest when:
- The fruit has developed its full mature color.
- The rind feels hard and cannot be easily scratched with a fingernail.
- The stem begins turning brown and dry.
- The vine starts declining naturally.
If an early frost is expected, harvest mature pumpkins before freezing temperatures arrive.
How to Harvest Pumpkins
Use clean, sharp pruning shears or a garden knife to cut the stem.
Leave 3–4 inches (7–10 cm) of stem attached to each pumpkin.
Avoid carrying pumpkins by the stem because it can break off, reducing storage life.
Handle harvested pumpkins carefully to avoid bruising or damaging the rind.
Before storing them, allow pumpkins to cure in a warm, dry location for about 7–10 days. This toughens the skin and helps extend storage life.
How to Save Pumpkin Seeds for Growing
If you’ve grown a healthy, productive pumpkin variety, saving seeds can be an excellent way to grow the same type again next season.
Many gardeners enjoy learning how to save pumpkin seeds for growing, and the process is surprisingly simple.
Step 1
Choose a fully mature, healthy pumpkin from a vigorous plant.
Step 2
Cut the pumpkin open and remove the seeds.
Step 3
Separate the seeds from the pulp by rinsing them thoroughly with clean water.
Step 4
Spread the clean seeds in a single layer on paper towels or a drying screen.
Allow them to air-dry for 1–2 weeks in a cool, dry location out of direct sunlight.
Step 5
Store completely dry seeds in a labeled paper envelope or airtight container.
Keep them in a cool, dry place until the next planting season.
Properly stored pumpkin seeds often remain viable for several years.
Benefits of Growing Pumpkins
Growing pumpkins offers much more than a beautiful fall harvest.
One of the biggest advantages is having fresh, homegrown produce that’s harvested at peak ripeness. Homegrown pumpkins often have better flavor and texture than store-bought ones.
Pumpkins are also packed with valuable nutrients, including:
- Vitamin A
- Vitamin C
- Vitamin E
- Potassium
- Fiber
- Antioxidants
In the garden, large pumpkin leaves help shade the soil, reducing weed growth and helping retain moisture during hot weather.
Growing pumpkins can also be a fun family activity, especially for children who enjoy watching the vines spread and the fruits gradually increase in size throughout the season.
Whether you’re growing pumpkins for cooking, decorating, or simply enjoying the gardening experience, they’re one of the most satisfying vegetables to grow at home.
Frequently Asked Questions
Can pumpkins grow in containers?
Yes. Compact and bush pumpkin varieties grow well in large containers with excellent drainage, fertile potting mix, and plenty of sunlight.
How much sunlight do pumpkins need?
Pumpkins perform best with 6–8 hours of direct sunlight each day.
How often should I water pumpkins?
Water deeply whenever the top inch of soil begins to dry. Consistent moisture is especially important during flowering and fruit development.
What's the best fertilizer for pumpkins?
During the early stages of growth, a balanced fertilizer provides the nutrients young pumpkin plants need to become well established. After the first flowers appear, choose a fertilizer that’s richer in phosphorus and potassium to support better fruit set and healthy pumpkin development.
Can I grow giant pumpkins at home?
Absolutely. Choose a giant pumpkin variety such as Dill’s Atlantic Giant, provide plenty of growing space, feed the plants regularly, and focus the plant’s energy on one or two developing fruits.
Final Thoughts
Learning how to grow pumpkins is one of the most rewarding gardening projects for beginners and experienced gardeners alike. With the right variety, fertile soil, full sunlight, consistent watering, and timely fertilization, healthy pumpkin plants can produce an abundant harvest season after season.
Whether you’re growing pumpkins in a traditional garden, a raised bed, a container, or even a small backyard, success comes from giving your plants consistent care throughout the growing season. Pay attention to soil health, monitor for pests and diseases, and harvest your pumpkins only after they’ve fully matured.
Every growing season teaches something new. Keep notes on the varieties you plant, the fertilizers you use, and the results you achieve. Over time, these observations will help you refine your techniques and enjoy even bigger, healthier pumpkin harvests year after year.
Happy gardening!
Recent Posts
How to Grow Sweet Potatoes: A Complete Guide for Beginners

How to Grow Corn: A Complete Guide for Home Gardeners
How to Grow Chili Peppers: A Complete Guide for Beginners
How to Grow Garlic: A Complete Guide to Planting, Caring for, and Harvesting Garlic
How to Grow Pumpkins: A Complete Beginner’s Guide to Bigger Harvests
Gardening Kits for Beginners
Best Time to Harvest Figs
Organic Fertilizer for Grapes
How to Plant and Grow Grapes
How to Grow and Care Cherries
Fertilizer for Banana Trees
How to Grow and Care Banana Tree
How to Grow Onions from Sprouted Onions