How to Grow Potatoes : A Complete Beginner's Guide for Bigger Harvests
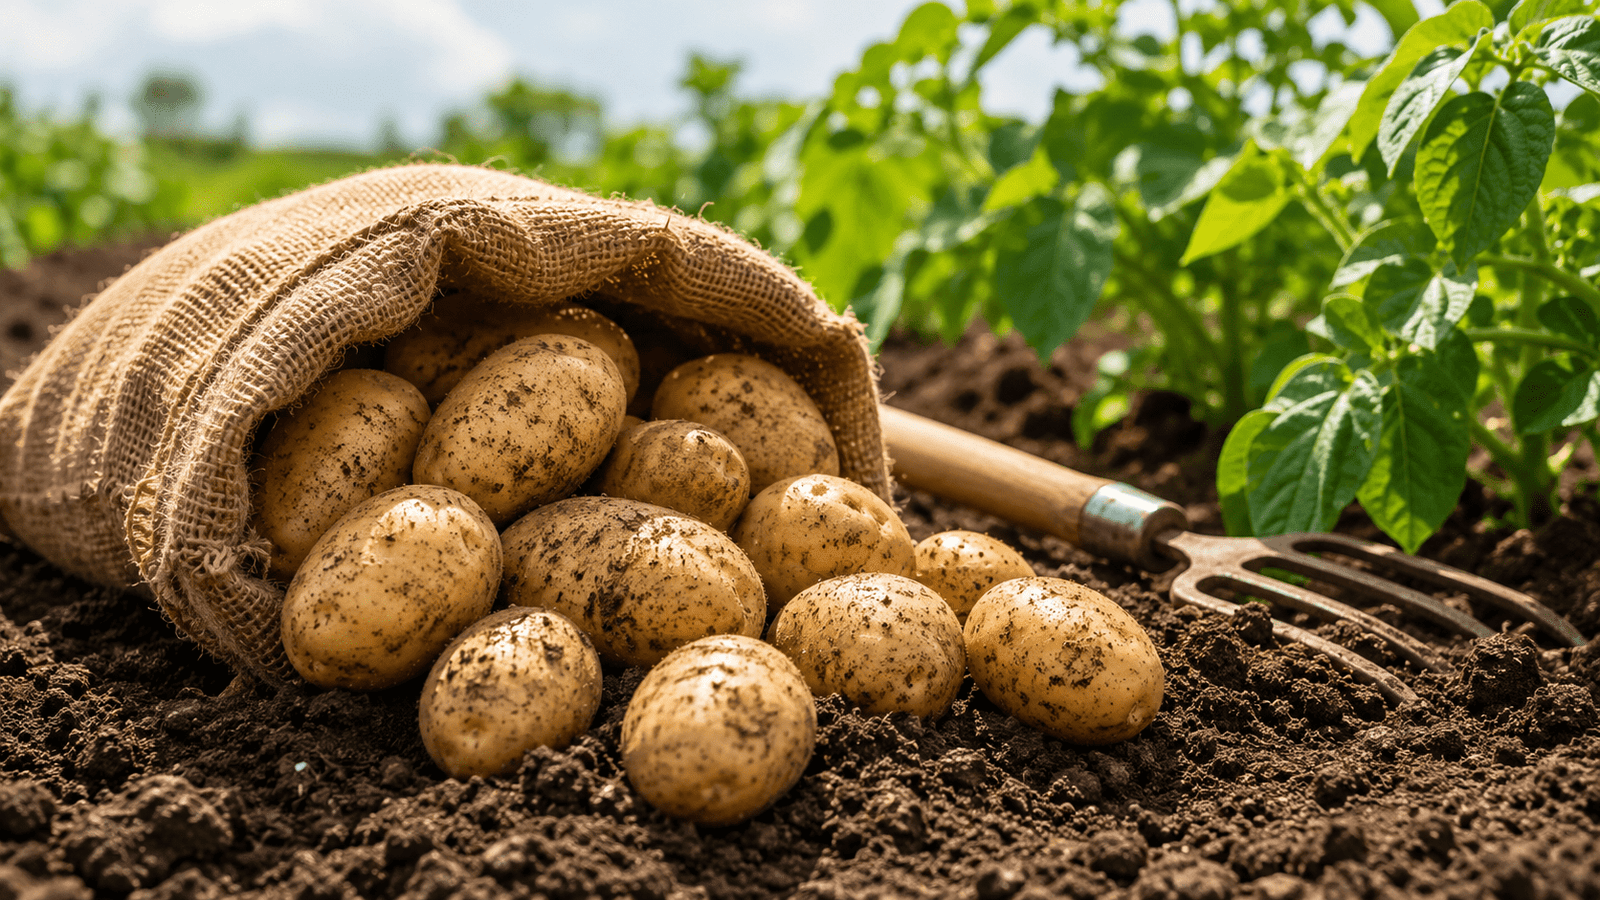
Growing potatoes at home is one of the most rewarding gardening projects for beginners and experienced gardeners alike. Whether you have a large backyard, a small vegetable garden, a raised bed, or even just a grow bag on your patio, potatoes are surprisingly easy to grow with the right preparation and care.
I still remember the first time I planted potatoes in an unused corner of my yard. At first, I wasn’t expecting much because the space had been neglected for years. After improving the soil with compost and giving the plants regular care, I harvested far more potatoes than I had imagined. That experience completely changed my opinion about growing potatoes. Since then, I’ve experimented with different growing methods, including raised beds, containers, and grow bags, to learn which techniques work best in different situations.
One thing I’ve learned is that growing potatoes isn’t just about putting seed potatoes into the ground and waiting. Healthy soil, proper watering, sunlight, and choosing the right planting time all play an important role in producing a successful harvest.
Whether you’re growing potatoes for fresh homegrown vegetables, to save money on groceries, or simply to enjoy gardening, this guide will walk you through every step of the process.
In this guide, you'll learn:
- The best time to grow potatoes
- How to prepare potato seeds
- How to make the ideal soil for potatoes
- The best fertilizer for potatoes
- How to grow potatoes in raised beds, grow bags, and containers
- How to grow potato sprouts
- Common potato growing mistakes
- How long potatoes take to grow
- The best time to harvest potatoes
- How to harvest and store potatoes properly
Table of Contents
ToggleBest Time to Grow Potatoes
One of the most common questions gardeners ask is when to plant potatoes. The answer depends on your local climate, but potatoes are generally considered a cool-season crop.
For most regions in the United States and many other temperate countries, potatoes are planted between March and May, after the risk of severe frost has passed. Gardeners living in colder northern regions usually plant a little later, while those in milder climates may start earlier in spring.
If you’re unsure about your planting schedule, a simple rule is to plant potatoes when the soil temperature reaches about 45–50°F (7–10°C). Cold, waterlogged soil can slow growth or cause seed potatoes to rot before they sprout.
If you have a shorter growing season, choosing early potato varieties can help you harvest before the weather becomes too hot. In warmer climates, gardeners often grow potatoes during the coolest part of the year.
From my own experience, I usually begin planting when the weather becomes consistently cool enough for young plants to establish healthy roots without being stressed by excessive heat. Over the years, I’ve found that planting too early in cold, wet soil rarely gives better results than waiting another week or two for better growing conditions.
Many beginners also ask how long potatoes take to grow.
The answer depends on the variety:
- First Early Potatoes: 70–90 days
- Second Early Potatoes: 90–110 days
- Maincrop Potatoes: 110–120 days
So, if you’re wondering how long it takes potatoes to grow, most varieties are ready to harvest within 70 to 120 days, depending on the cultivar, weather conditions, and how well the plants are cared for throughout the season.
Before moving on to soil preparation and planting, it’s worth remembering that selecting healthy seed potatoes and preparing them correctly can significantly improve your harvest.
How to Prepare Potato Seeds
Before planting, one of the most important steps is choosing and preparing healthy seed potatoes. Many beginners overlook this stage, but it can make a significant difference in the quality and size of your harvest.
A healthy seed potato produces stronger plants, develops a better root system, and is generally more resistant to common diseases. That’s why experienced gardeners recommend starting with quality seed potatoes rather than planting just any potato from the kitchen.
Should You Use Store-Bought Potatoes?
Technically, yes—you can grow potatoes from grocery store potatoes. However, I don’t usually recommend it.
Many supermarket potatoes are treated with sprout inhibitors to extend their shelf life. These treatments can delay sprouting, and some potatoes may carry diseases that reduce your harvest or spread problems to your garden soil.
If you’re gardening for the first time, certified seed potatoes are a much safer and more reliable choice.
That said, if you already have healthy potatoes at home that have naturally started sprouting, they can still grow successfully. I’ve grown potatoes from naturally sprouted kitchen potatoes before. While the results weren’t always as consistent as certified seed potatoes, they still produced a satisfying harvest in well-prepared soil.
How to Select Healthy Seed Potatoes
Choose seed potatoes that are:
- Firm and heavy for their size
- Free from cuts, bruises, or soft spots
- Free from mold or unpleasant odors
- Showing short, healthy sprouts if pre-sprouted
- Disease-free and certified whenever possible
Avoid potatoes that feel soft, shriveled, or have dark sunken spots, as these are often signs of disease or poor storage.
How to Grow Potato Sprouts (Chitting)
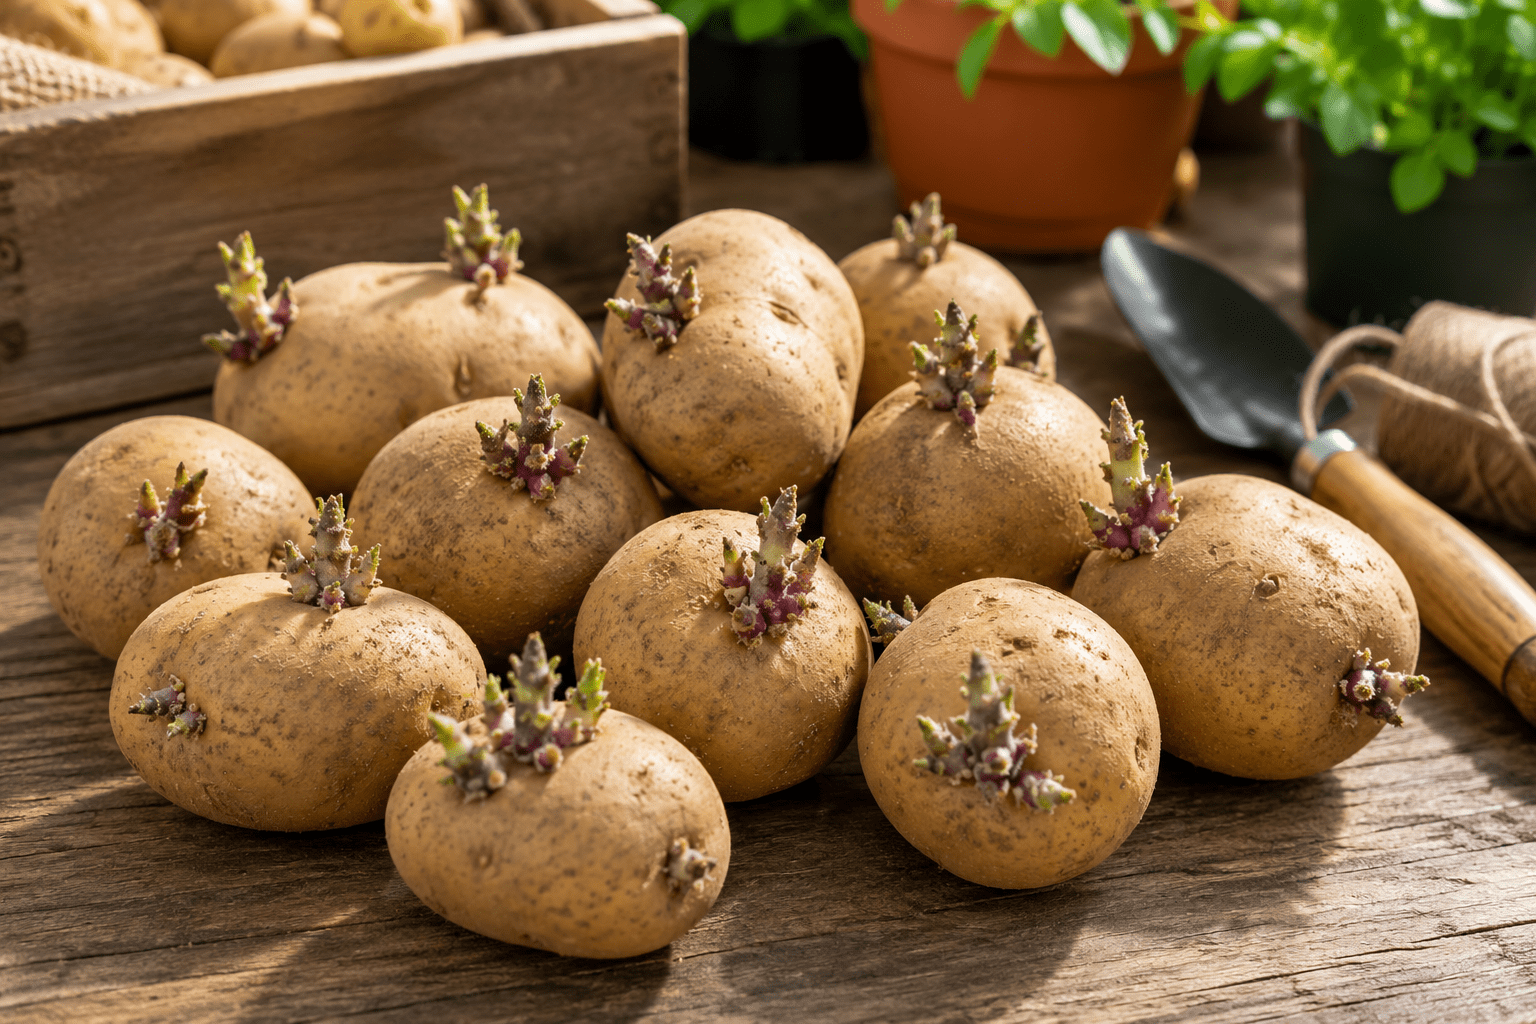
If you’ve searched for how to grow potato sprouts, you’re referring to a process called chitting.
Chitting simply means allowing seed potatoes to develop short, strong sprouts before planting. This gives the plants a head start and often leads to faster growth and earlier harvests.
Here’s how to do it:
- Place the seed potatoes in a cool, bright room.
- Keep the temperature between 50–60°F (10–15°C).
- Avoid direct sunlight.
- Position the potatoes so that the end with the most “eyes” faces upward.
- Leave them for 2–4 weeks.
The ideal sprouts should be short, thick, and green or purple—not long, thin, and white.
From my own experience, I’ve noticed that potatoes with short, sturdy sprouts establish themselves much faster after planting than freshly cut seed potatoes without any sprouts.
Should You Cut Seed Potatoes?
Large seed potatoes can be cut into smaller pieces before planting.
Each piece should have:
- At least one or two healthy eyes
- Enough flesh to support early growth
After cutting them, allow the pieces to dry for 24–48 hours in a cool, dry place. This forms a protective layer over the cut surface, reducing the risk of rot once planted.
Small seed potatoes don’t need to be cut and can be planted whole.
Common Mistakes When Preparing Seed Potatoes
Many beginners make simple mistakes that reduce their harvest.
Avoid these common problems:
- Planting soft or rotten potatoes
- Using potatoes with very long, weak sprouts
- Cutting potatoes and planting them immediately without allowing the cut surface to dry
- Storing seed potatoes in warm, dark places before planting
- Choosing damaged potatoes with signs of disease
Taking a little extra time to prepare your seed potatoes properly often results in healthier plants and a much better harvest later in the season.
How to Make Soil for Potatoes
Healthy soil is one of the biggest factors that determines whether you’ll harvest a few small potatoes or a basket full of large, healthy tubers.
Potatoes grow underground, so the soil needs to provide enough space for the tubers to expand while also draining excess water. Heavy, compacted soil often leads to poor growth and oddly shaped potatoes.
If someone asks me what contributes most to a successful potato harvest, my answer is always the same: good soil comes before fertilizer.
During my first potato-growing season, I focused more on feeding the plants than improving the soil. The plants looked healthy above ground, but the harvest was disappointing because the soil was too compact. Once I started adding compost and improving drainage, the difference was remarkable.
Best Soil for Growing Potatoes
Potatoes grow best in soil that is:
- Loose and crumbly
- Rich in organic matter
- Well-draining
- Slightly acidic, with a pH between 5.5 and 6.5
Avoid heavy clay soil whenever possible. If your garden has clay soil, mix in compost, well-rotted manure, or coarse sand to improve drainage and create a lighter texture.
A Simple Soil Mix for Raised Beds or Grow Bags
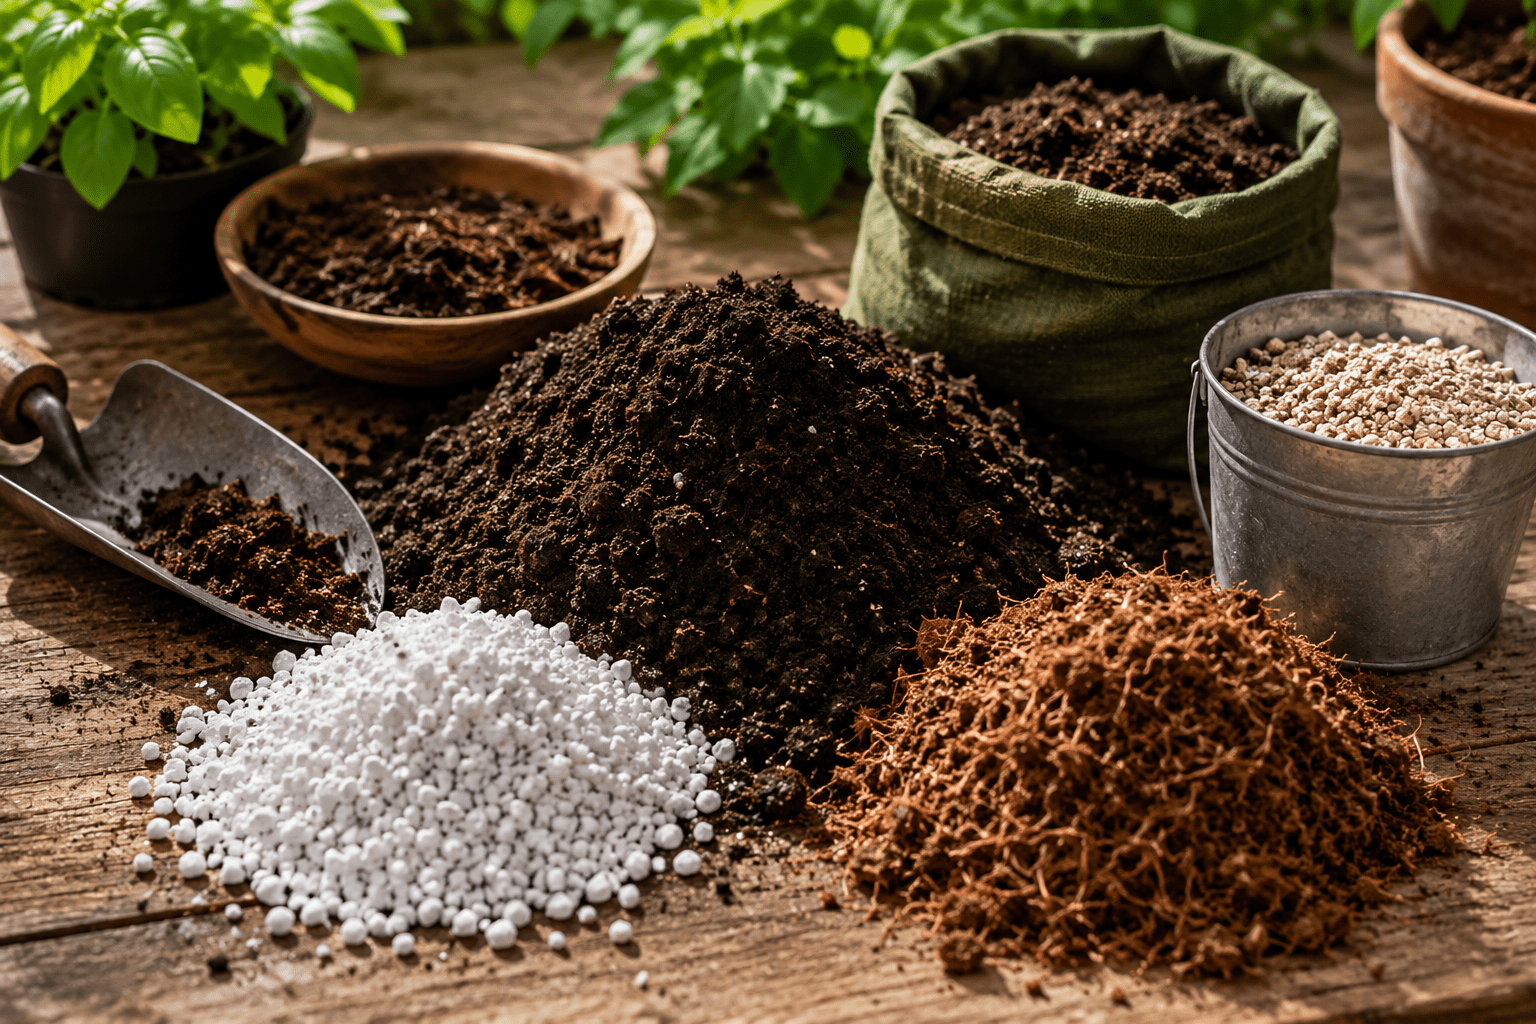
If you’re growing potatoes in a raised bed, container, or grow bag, you can prepare an excellent growing mix using:
- 40% quality garden soil
- 40% compost
- 20% coco coir or peat moss
Adding a small amount of perlite can also improve drainage and help prevent waterlogging.
This mix stays loose throughout the growing season, making it easier for potatoes to develop evenly and reducing the risk of rot.
Best Fertilizer for Potatoes
Choosing the right fertilizer is one of the easiest ways to improve potato growth and increase your harvest. While potatoes don’t require constant feeding, providing the right nutrients at the right time helps the plants develop healthy roots, strong foliage, and large, well-formed tubers.
Many beginner gardeners make the mistake of applying too much nitrogen. Although this encourages lush green leaves, it often results in fewer potatoes underground.
Instead, potatoes benefit from a balanced fertilizer during early growth and a fertilizer that’s slightly higher in phosphorus and potassium as the tubers begin to develop.
What Nutrients Do Potatoes Need?
Potatoes primarily need three essential nutrients:
- Nitrogen (N) – Supports healthy leaf and stem growth.
- Phosphorus (P) – Encourages strong root development and early tuber formation.
- Potassium (K) – Improves tuber size, quality, and disease resistance.
For many home gardens, fertilizers with balanced or slightly higher phosphorus and potassium levels work well.
When Should You Fertilize Potatoes?
Timing is just as important as the fertilizer itself.
I usually follow this schedule:
Before Planting
Mix compost or well-rotted organic matter into the soil.
2–3 Weeks After Emergence
Apply a balanced fertilizer around the plants.
During Tuber Development
Give the plants another light feeding with a fertilizer that’s higher in potassium.
Avoid fertilizing once the plants begin to yellow naturally before harvest. At that stage, the potatoes are finishing their growth, and additional fertilizer provides little benefit.
Best Organic Fertilizer for Potatoes
If you’re trying to grow potatoes naturally, you’ll be happy to know that they respond very well to organic fertilizers.
Over the years, I’ve found that improving soil health with organic materials often produces more consistent results than relying solely on synthetic fertilizers.
Some of my favorite organic fertilizers include:
- Well-aged compost
- Composted cow or poultry manure
- Bone meal
- Fish meal
- Kelp meal
- Wood ash (used sparingly, depending on soil pH)
Compost remains my first choice because it not only provides nutrients but also improves soil structure, drainage, and moisture retention.
When using manure, always make sure it’s fully composted. Fresh manure can burn young roots and may introduce unwanted pathogens into the soil.
Fertilizer Mistakes to Avoid
Avoid these common mistakes:
- Applying too much nitrogen.
- Fertilizing dry soil without watering afterward.
- Overfeeding throughout the season.
- Using fresh manure immediately before planting.
- Applying fertilizer directly against the seed potatoes.
A little fertilizer applied correctly is almost always better than applying too much.
How to Grow Potatoes (Step by Step)
Now that your seed potatoes are ready and your soil has been prepared, it’s time for the most exciting part—planting.
Although there are several growing methods, the basic planting principles remain the same.
Step 1 – Choose a Sunny Location
Potatoes grow best in full sun, receiving at least 6–8 hours of direct sunlight each day.
Too much shade usually results in weak plants and a smaller harvest.
Step 2 – Prepare the Planting Area
Loosen the soil to a depth of 8–12 inches (20–30 cm).
Remove weeds, stones, and large roots that could interfere with tuber development.
If needed, mix in compost before planting.
Step 3 – Plant the Seed Potatoes
Dig trenches about 4–6 inches (10–15 cm) deep.
Place each seed potato with the sprouts facing upward.
Leave approximately:
- 12 inches (30 cm) between plants.
- 24–36 inches (60–90 cm) between rows.
Cover lightly with soil.
Step 4 – Water Carefully
Water immediately after planting if the soil is dry.
After that, keep the soil evenly moist but never soggy.
Overwatering is one of the fastest ways to damage developing potatoes.
Step 5 – Hill the Plants
As the stems grow to around 6–8 inches (15–20 cm) tall, gently mound soil around the base of each plant.
Repeat this process every few weeks.
Hilling protects developing potatoes from sunlight, preventing them from turning green and producing solanine.
How to Grow Potatoes in a Bag
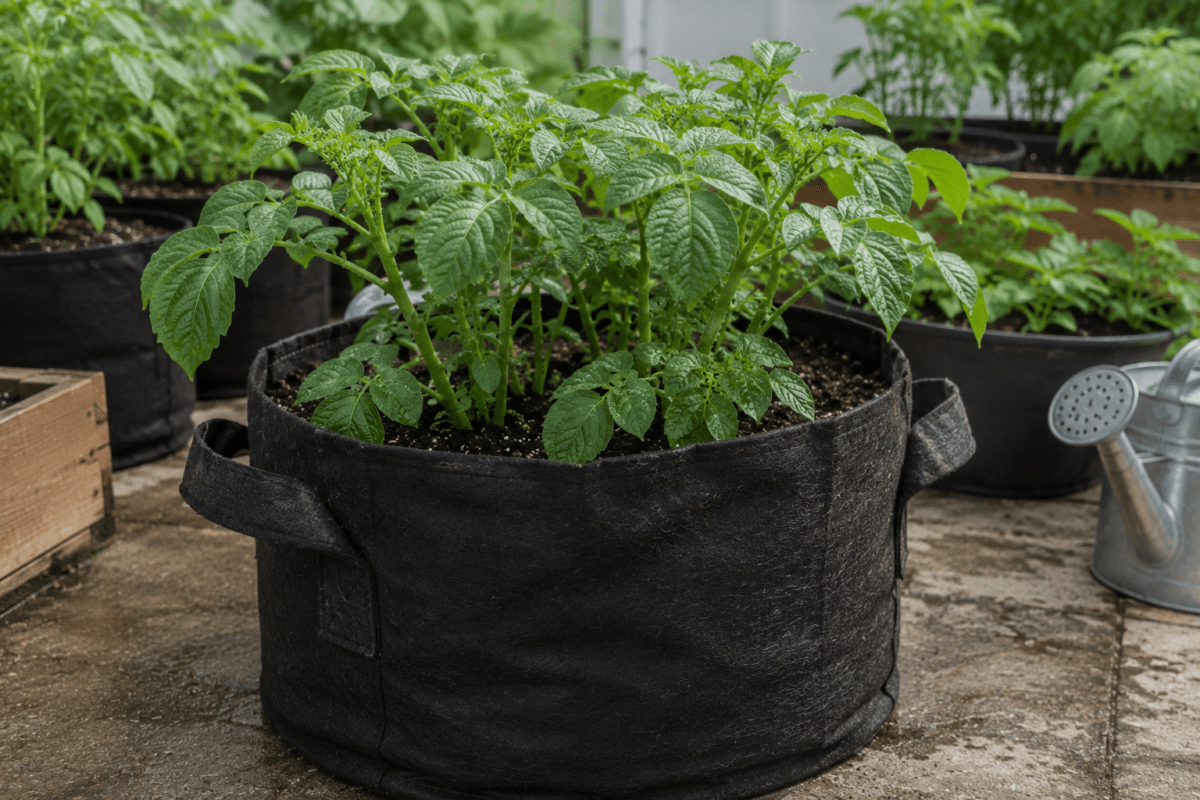
One of the most popular questions people ask is how to grow potatoes in a bag.
The good news is that grow bags are an excellent option for gardeners with limited space.
I’ve used grow bags several times, especially when I wanted to experiment with different potato varieties. They make harvesting incredibly easy because you simply empty the bag instead of digging through garden soil.
What You'll Need
- A 10–15 gallon grow bag.
- High-quality potting mix
- Compost
- Healthy seed potatoes
- Slow-release fertilizer (optional)
Planting in a Grow Bag
- Fill the bottom of the bag with about 4–6 inches (10–15 cm) of soil mix.
- Place 2–3 seed potatoes on the surface.
- Cover them with another 3–4 inches (8–10 cm) of soil.
- Water thoroughly.
- As the plants grow, gradually add more soil until the bag is nearly full.
Caring for Grow Bag Potatoes
Grow bags dry out faster than garden soil.
Check the moisture regularly, especially during warm weather.
Keep the bag in a sunny location and feed the plants lightly during the growing season.
From my own experience, grow bags produce surprisingly good harvests when watering is consistent. The only challenge is that they can dry out much faster than raised beds during hot summer weather, so regular moisture checks become even more important.
Potato Care
Planting potatoes is only the beginning. Once the plants start growing, consistent care plays a major role in determining how healthy your harvest will be. Fortunately, potatoes don’t require constant attention, but a few simple practices can make a noticeable difference.
Watering Potatoes
Proper watering is essential for producing large, healthy potatoes.
The soil should remain consistently moist but never waterlogged. As a general guideline, potatoes need about 1–2 inches (2.5–5 cm) of water per week, including rainfall.
During hot or dry weather, you may need to water more frequently. Instead of watering a little every day, it’s usually better to water deeply once or twice a week so the moisture reaches the developing tubers.
One mistake I made during my first season was watering only when the soil looked dry on the surface. Later, I realized the soil underneath was often much drier than I expected. Since then, I’ve always checked the moisture a few inches below the surface before deciding whether to water.
Avoid These Watering Mistakes
- Letting the soil dry out completely.
- Keeping the soil constantly wet.
- Watering late in the evening too often.
- Splashing water on the leaves instead of watering the soil.
Sunlight Requirements
Potatoes grow best in full sun, receiving at least 6–8 hours of direct sunlight every day.
Too much shade often results in:
- Weak stems
- Smaller tubers
- Lower yields
If you’re growing potatoes in containers or grow bags, place them where they’ll receive sunlight for most of the day.
Mulching
Mulching offers several benefits throughout the growing season.
A layer of organic mulch helps:
- Retain soil moisture
- Reduce weed growth
- Keep soil temperatures more stable.
- Minimize soil splash that can spread disease.
Suitable mulch materials include:
- Straw
- Shredded leaves
- Grass clippings (dried first)
- Pine needles (used lightly)
Apply mulch only after the plants are well established.
Common Potato Problems
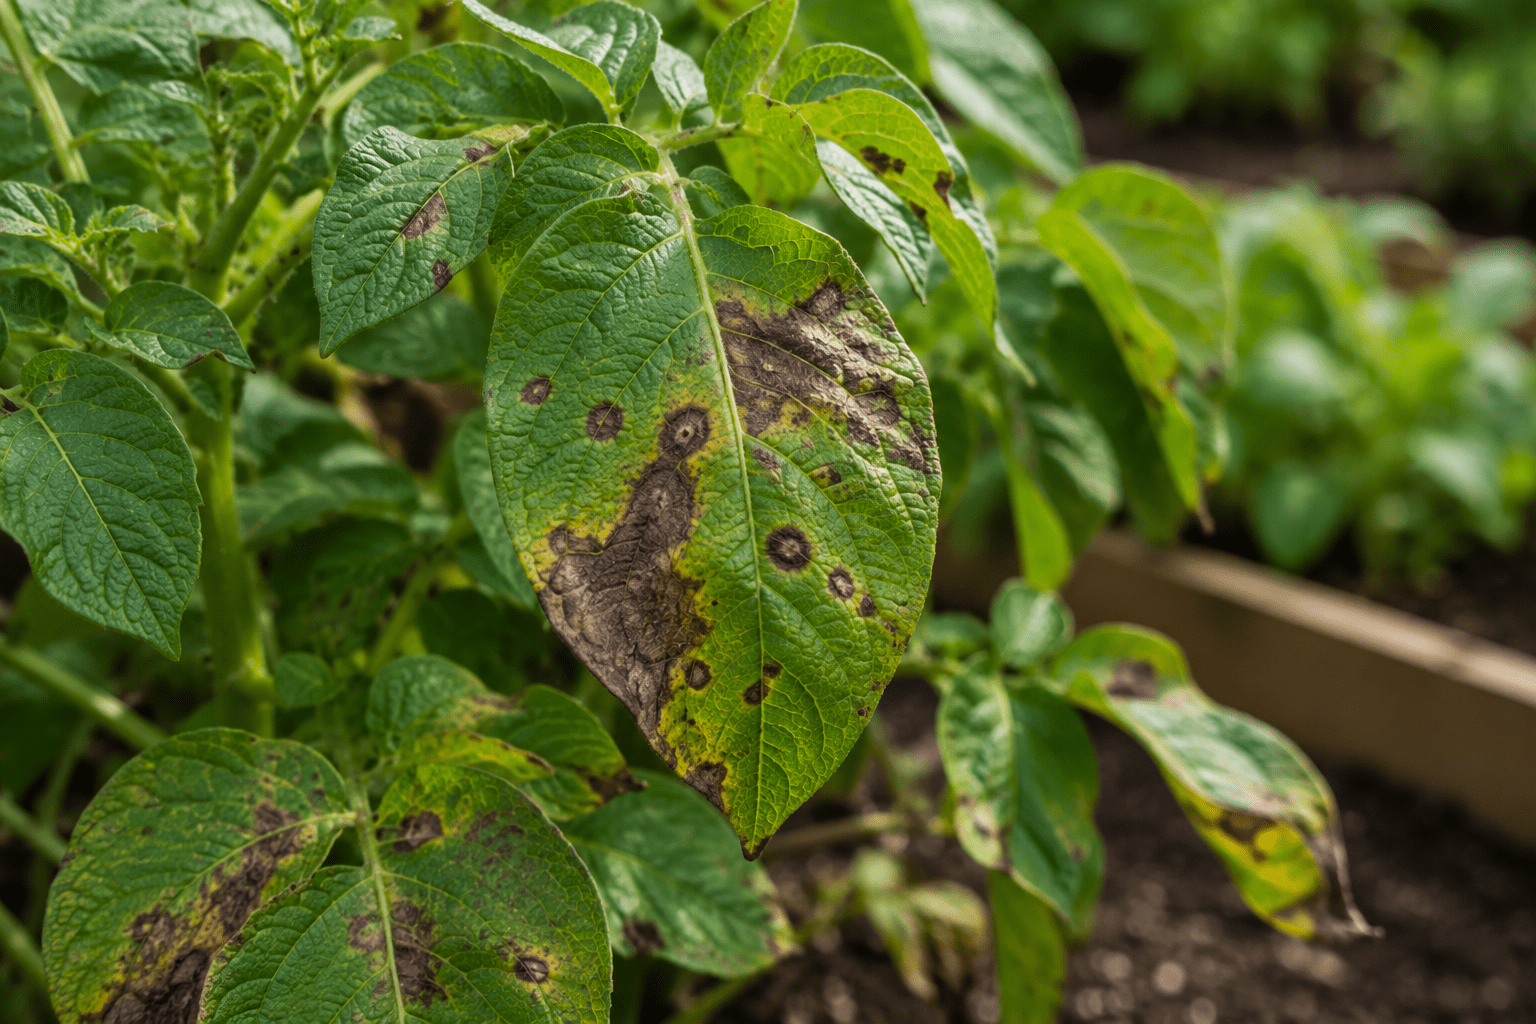
Even healthy potato plants can occasionally experience problems. The good news is that many issues can be prevented with proper care and early observation.
Yellow Leaves
Yellow leaves can be caused by:
- Overwatering
- Underwatering
- Nutrient deficiencies
- Natural aging before harvest
If the lower leaves begin turning yellow near the end of the growing season, it’s usually a normal sign that the potatoes are approaching maturity.
Late Blight
Late blight is one of the most serious potato diseases.
Symptoms include:
- Dark brown spots on leaves
- Blackened stems
- Rapid plant collapse during cool, wet weather
Remove infected plants immediately and avoid composting severely diseased material.
Good air circulation and watering at the soil level can help reduce the risk.
Colorado Potato Beetles
Gardeners in North America are especially familiar with Colorado potato beetles.
These insects feed aggressively on potato leaves and can quickly weaken plants.
For small gardens:
- Hand-pick beetles and larvae.
- Check the undersides of leaves for yellow-orange egg clusters.
- Remove eggs before they hatch.
Slugs
Slugs may damage developing potatoes and young shoots, especially during wet weather.
Keeping the area clean and avoiding excessive moisture helps reduce slug activity.
Best Time to Harvest Potatoes
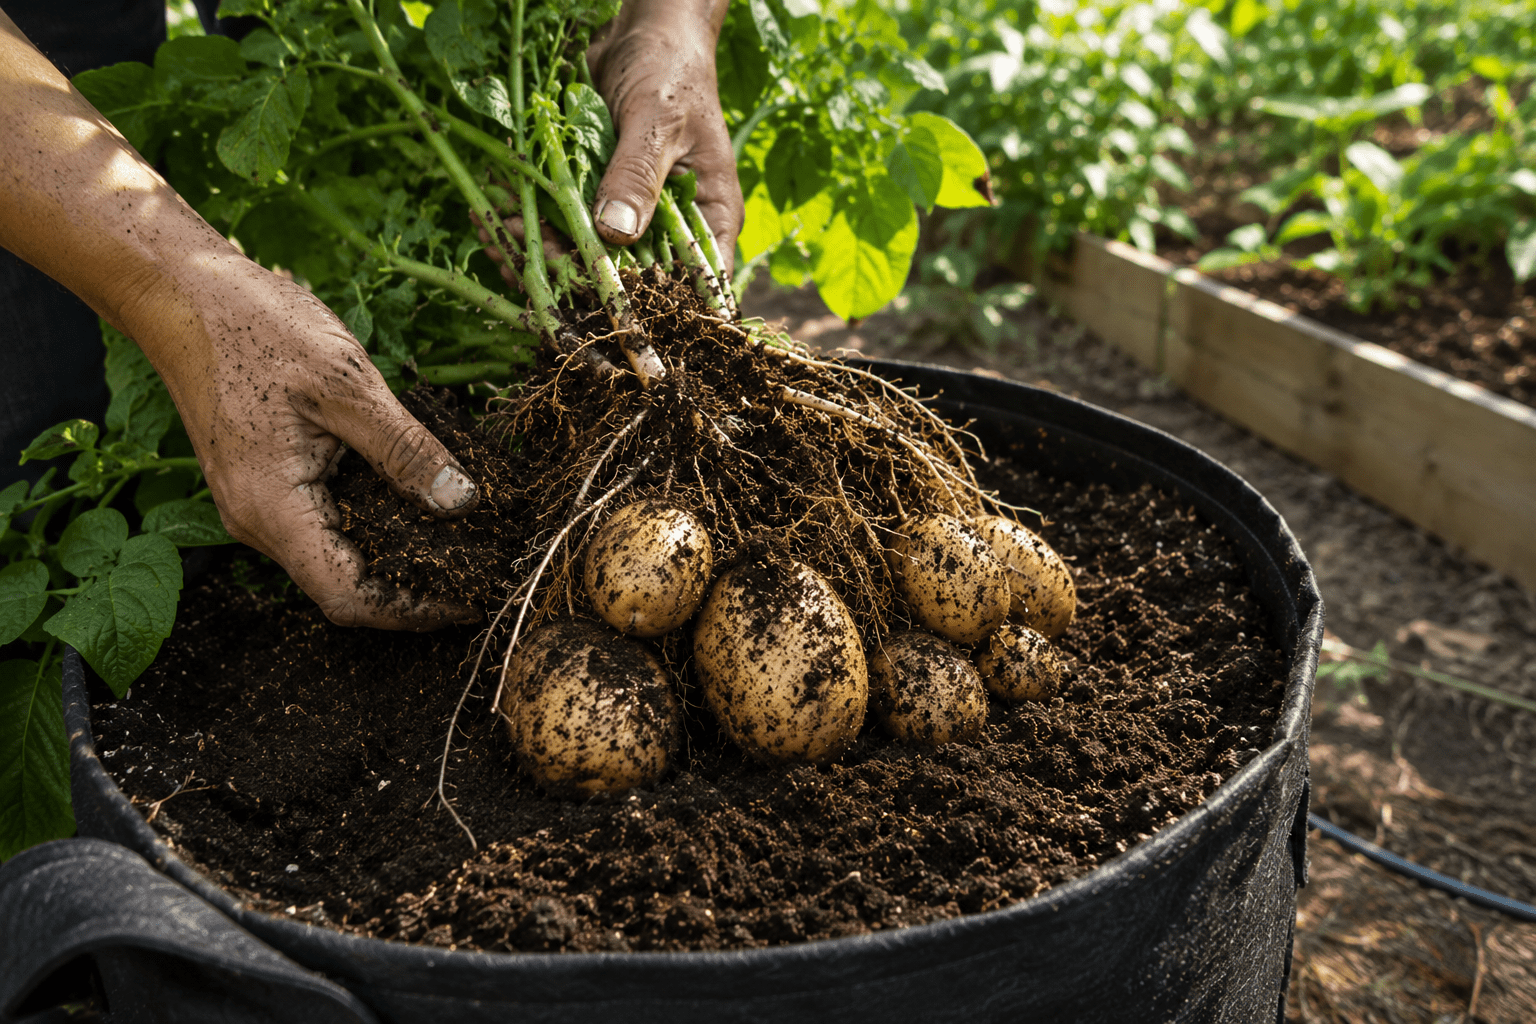
One of the most exciting moments is harvest day.
Many people ask How do you know potatoes are ready to harvest?
The answer depends on whether you want new potatoes or fully mature potatoes.
New Potatoes
These can usually be harvested 2–3 weeks after flowering.
They have thin skins and are best eaten fresh.
Mature Potatoes
Wait until:
- The foliage turns yellow.
- The stems begin to dry naturally.
- The plant starts dying back.
This usually happens 70–120 days after planting, depending on the variety.
How to Harvest and Store Potatoes
Harvest on a dry day whenever possible.
Use a garden fork or shovel carefully to loosen the soil around the plant without damaging the potatoes.
Lift the entire plant and gently collect the tubers by hand.
Avoid throwing or dropping freshly harvested potatoes because bruising can shorten their storage life.
Curing Potatoes
Before storing, allow potatoes to cure for about 7–10 days in a cool, dry, well-ventilated place away from direct sunlight.
This toughens the skin and helps small cuts heal naturally.
Storage Tips
For long-term storage:
- Keep potatoes in a cool, dark location.
- Maintain good air circulation.
- Avoid plastic bags.
- Store them away from onions, as onions release gases that may encourage potatoes to sprout more quickly.
- Check stored potatoes every few weeks and remove any that show signs of rot.
When stored properly, many potato varieties can remain in good condition for several months.
Frequently Asked Questions
Most potato varieties are ready to harvest in 70–120 days, depending on the variety and growing conditions.
Yes. Grow bags are an excellent option for gardeners with limited space and are often easier to harvest than traditional garden beds.
Yes, but certified seed potatoes are generally recommended because they’re less likely to carry diseases or sprout inhibitors.
Most gardens require about 1–2 inches of water per week, adjusting for rainfall and temperature.
Yes. Potatoes perform best with at least 6–8 hours of direct sunlight each day.
A balanced fertilizer during early growth followed by one with higher potassium during tuber development usually produces excellent results.
Wait until the foliage naturally turns yellow and dies back if you’re harvesting mature potatoes.
Absolutely. Containers and grow bags are both excellent choices for gardeners with limited space.
Final Thoughts
Growing potatoes at home is easier than many people expect. With healthy seed potatoes, fertile soil, proper watering, and a little patience, even first-time gardeners can enjoy an abundant harvest.
While every garden is different, the basic principles remain the same: plant at the right time, provide plenty of sunlight, keep the soil consistently moist, and monitor your plants regularly throughout the season.
From my own experience, every growing season teaches something new. Some years produce larger harvests than others, but each season offers an opportunity to learn and improve. That’s one of the reasons I continue growing potatoes year after year.
If this is your first time growing potatoes, don’t worry about achieving perfection. Start with a few healthy plants, follow the steps in this guide, observe how they respond to your local conditions, and enjoy the process. Gardening is a skill that improves with every season—and harvesting your own fresh potatoes is one of the most satisfying rewards.
Recent Posts
How to Grow Sweet Potatoes: A Complete Guide for Beginners

How to Grow Corn: A Complete Guide for Home Gardeners
How to Grow Chili Peppers: A Complete Guide for Beginners
How to Grow Garlic: A Complete Guide to Planting, Caring for, and Harvesting Garlic
How to Grow Pumpkins: A Complete Beginner’s Guide to Bigger Harvests
Gardening Kits for Beginners
Best Time to Harvest Figs
Organic Fertilizer for Grapes
How to Plant and Grow Grapes
How to Grow and Care Cherries
Fertilizer for Banana Trees
How to Grow and Care Banana Tree
How to Grow Onions from Sprouted Onions